Chat Component
Introduction
The ethora-chat-component npm package addresses these needs. With just a few lines of code, you can quickly set up a lightweight version of the Ethora chat room functionality. Future updates will enhance the chat component, and we plan to introduce additional npm packages for Digital Wallet and AI functionalities.
Prerequisites
Before you get started with the ethora-chat-component, ensure you have the following:
- Node.js and npm installed on your machine. You can download and install them from Node.js official website (opens in a new tab).
Using Ethora Chat Component
Alpha version 24.07.03
Follow these steps to set up a new project and integrate the ethora-chat-component:
-
Create a new Vite project:
npm create vite@latest -
Select the project name and type (React/JavaScript) during the setup prompts.
-
Navigate to the project directory:
cd project-name -
Install the project dependencies:
npm install -
Install the ethora-chat-component package:
npm i projecet-2-ccomp -
Open the
src/App.tsxfile and replace its content with the following code:src/App.tsximport { ChatWrapper as Chat } from "projecet-2-ccomp"; import { store } from "projecet-2-ccomp"; import { Provider } from "react-redux"; import "./App.css"; function App() { return ( <Provider store={store}> <Chat MainComponentStyles={{ width: "100%" }} /> </Provider> ); } export default App;
Configuring Widget Styles
-
For styling you can alter
App.csssrc/App.css#root { width: 100%; margin: 0 auto; text-align: center; }src/index.cssbody { margin: 0; display: flex; place-items: center; min-width: 320px; min-height: 100vh; width: 100%; } -
Run the project with
npm run devThis will start the development server at http://localhost:5173/ (opens in a new tab).
-
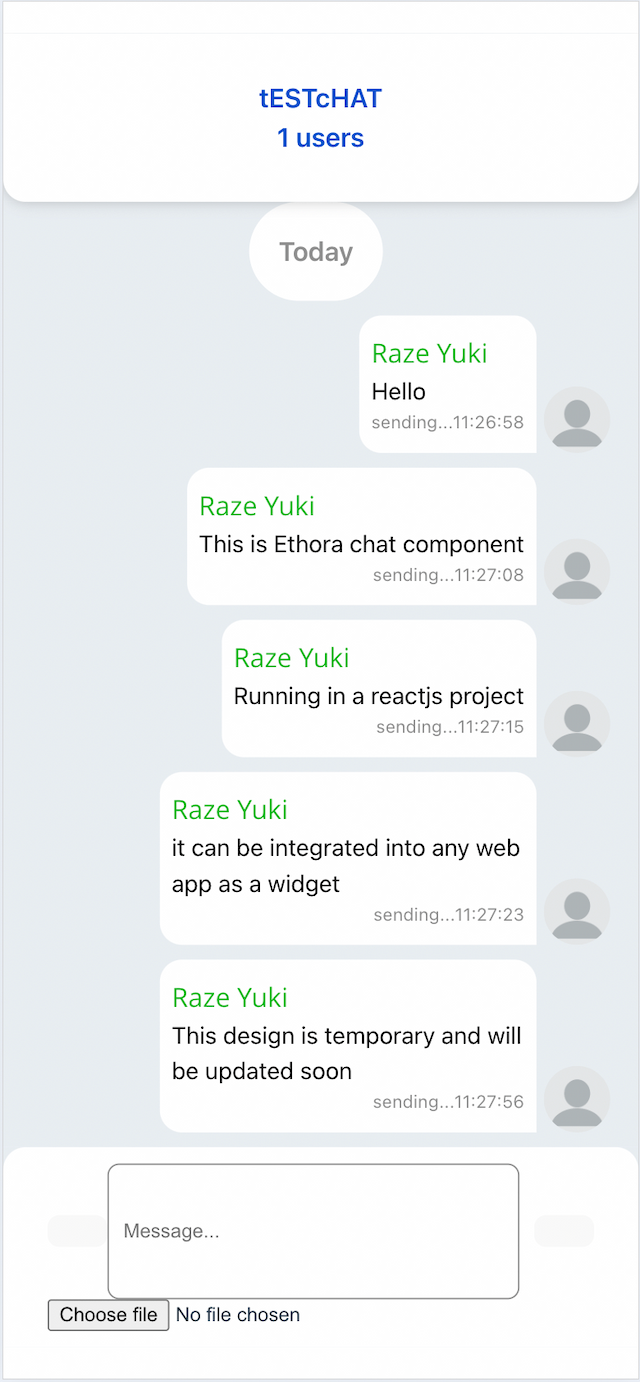
Open your browser and navigate to the above URL. You should see the chat component running.
In the screenshot below, you can see how the chat component appears in the browser.
